Install Quick Start
AgPowered Services are available as plugins to the Azure Data Manager for Agriculture (ADMA). If you do not have an existing ADMA instance, please follow the Quick Start Guide to Install ADMA.
This guide can be used to install any of the available AgPowered Services. These instructions will guide you to:
- Install an AgPowered Service
- Subscribe to a Free Trial Plan
Install Permissions
Ensure you are logged into the Azure Portal. For ease of installation, it is recommended to have Application Administrator permissions in Azure.
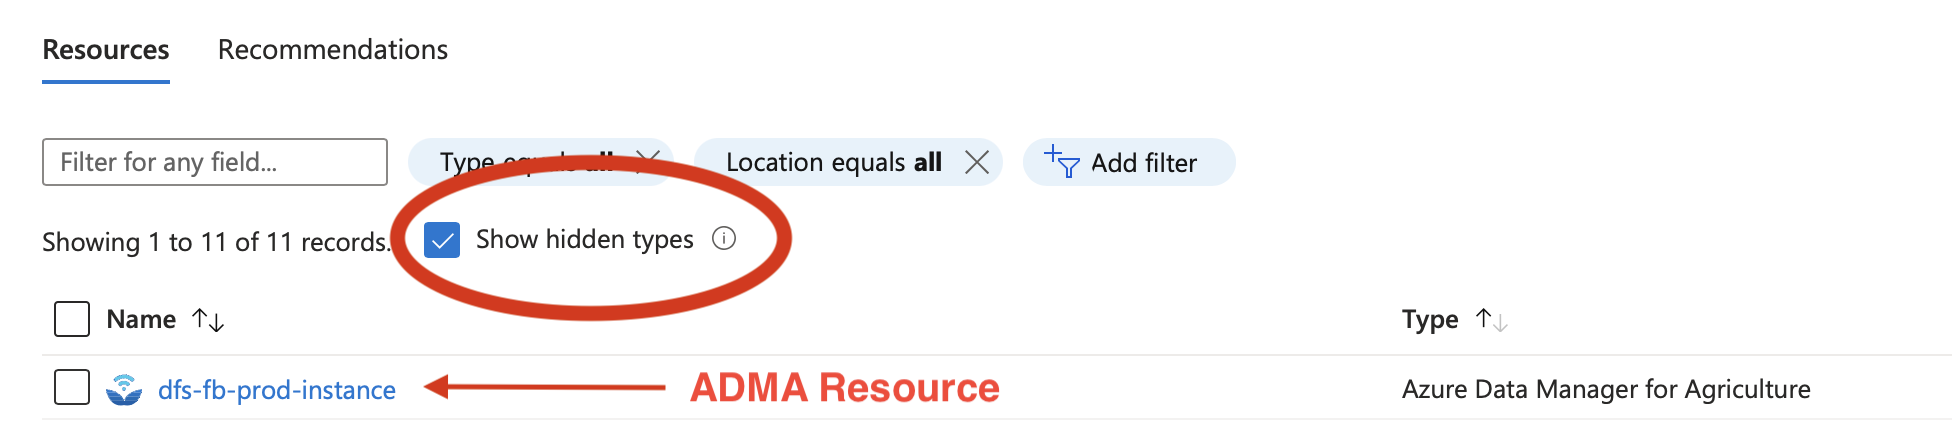
Navigate to your ADMA Resource
Navigate to your ADMA Resource in the Azure Portal. This can be found by going to the resource group associated with your ADMA resource and clicking on 'Show Hidden Types'. Click on the ADMA Resource link to go to the resource page.
Due to ADMA not yet being commercially available, the resource is hidden in the Azure Portal.
Add Solution
- In your ADMA resource page, click on Solutions
- Click Add on the top bar and then select Add for the AgPowered Service you would like to install
| Add New Solution |
|---|
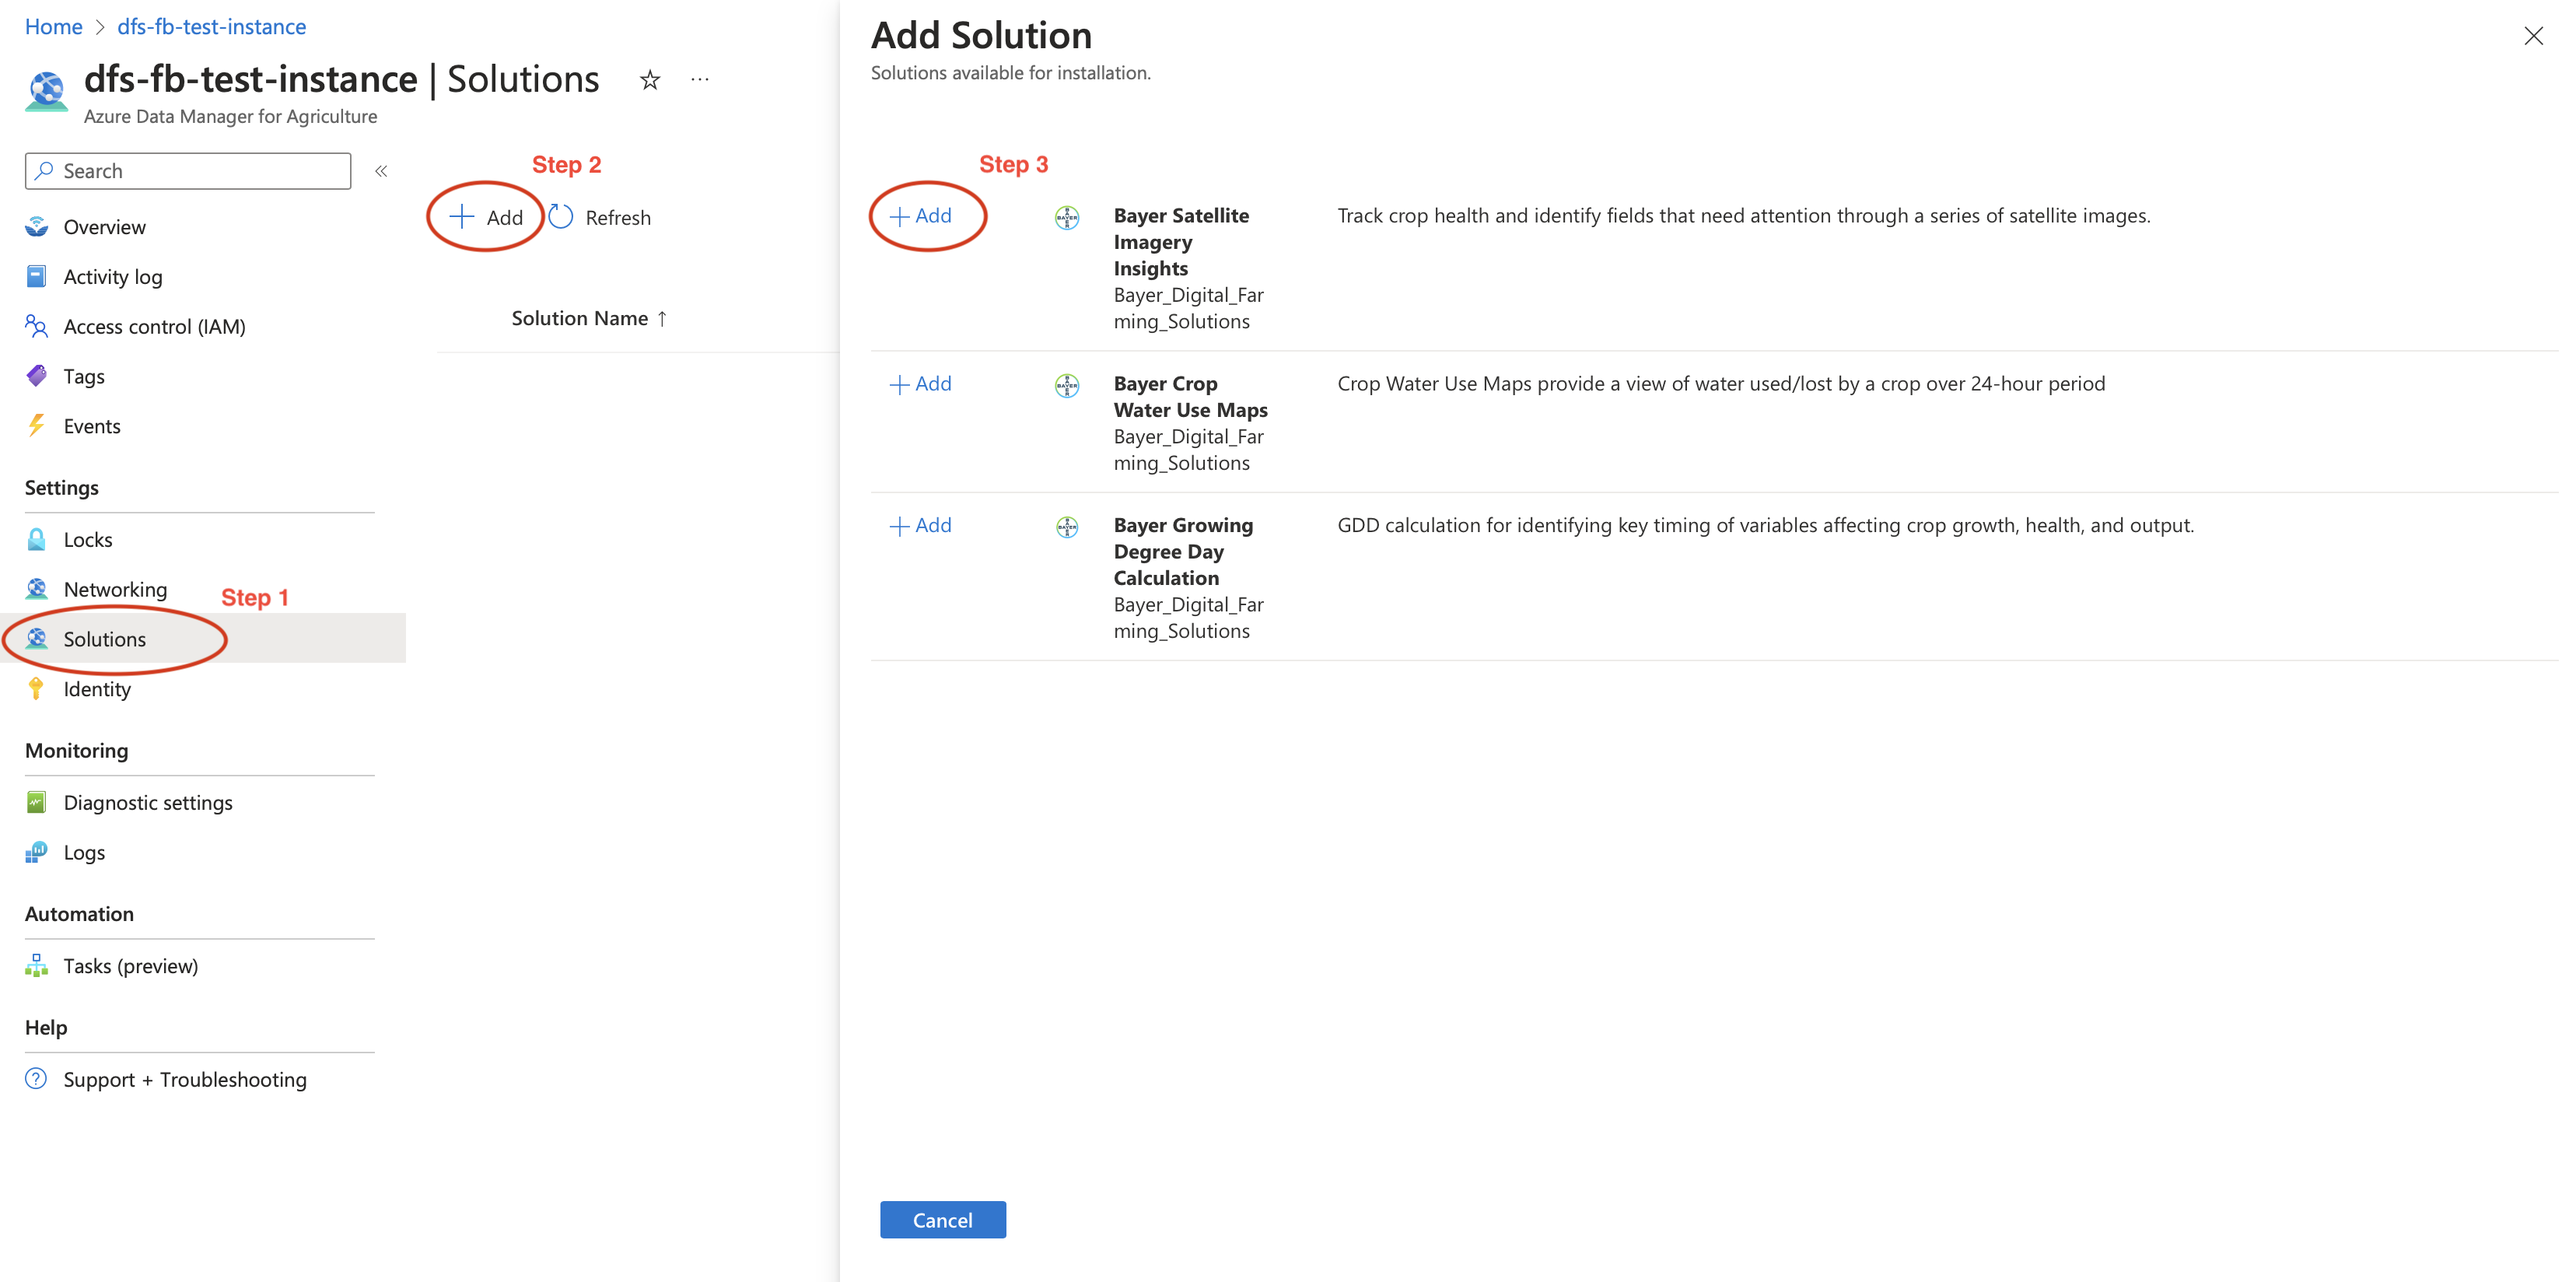 |
- Follow the directions in the Add Solution form. This will include enabling Admin Consent for the AgPowered Service, finding the AgPowered Service Object ID in Microsoft Entra, and selecting the usage plan.
If you do not have Application Administrator permissions to enable Admin Consent, copy the Admin Consent link in the hyperlink and provide this to your Azure Admin.
AgPowered Services require access to the Azure Subscription where your ADMA instance is located. This process is called Admin Consent
| Add Solution Form |
|---|
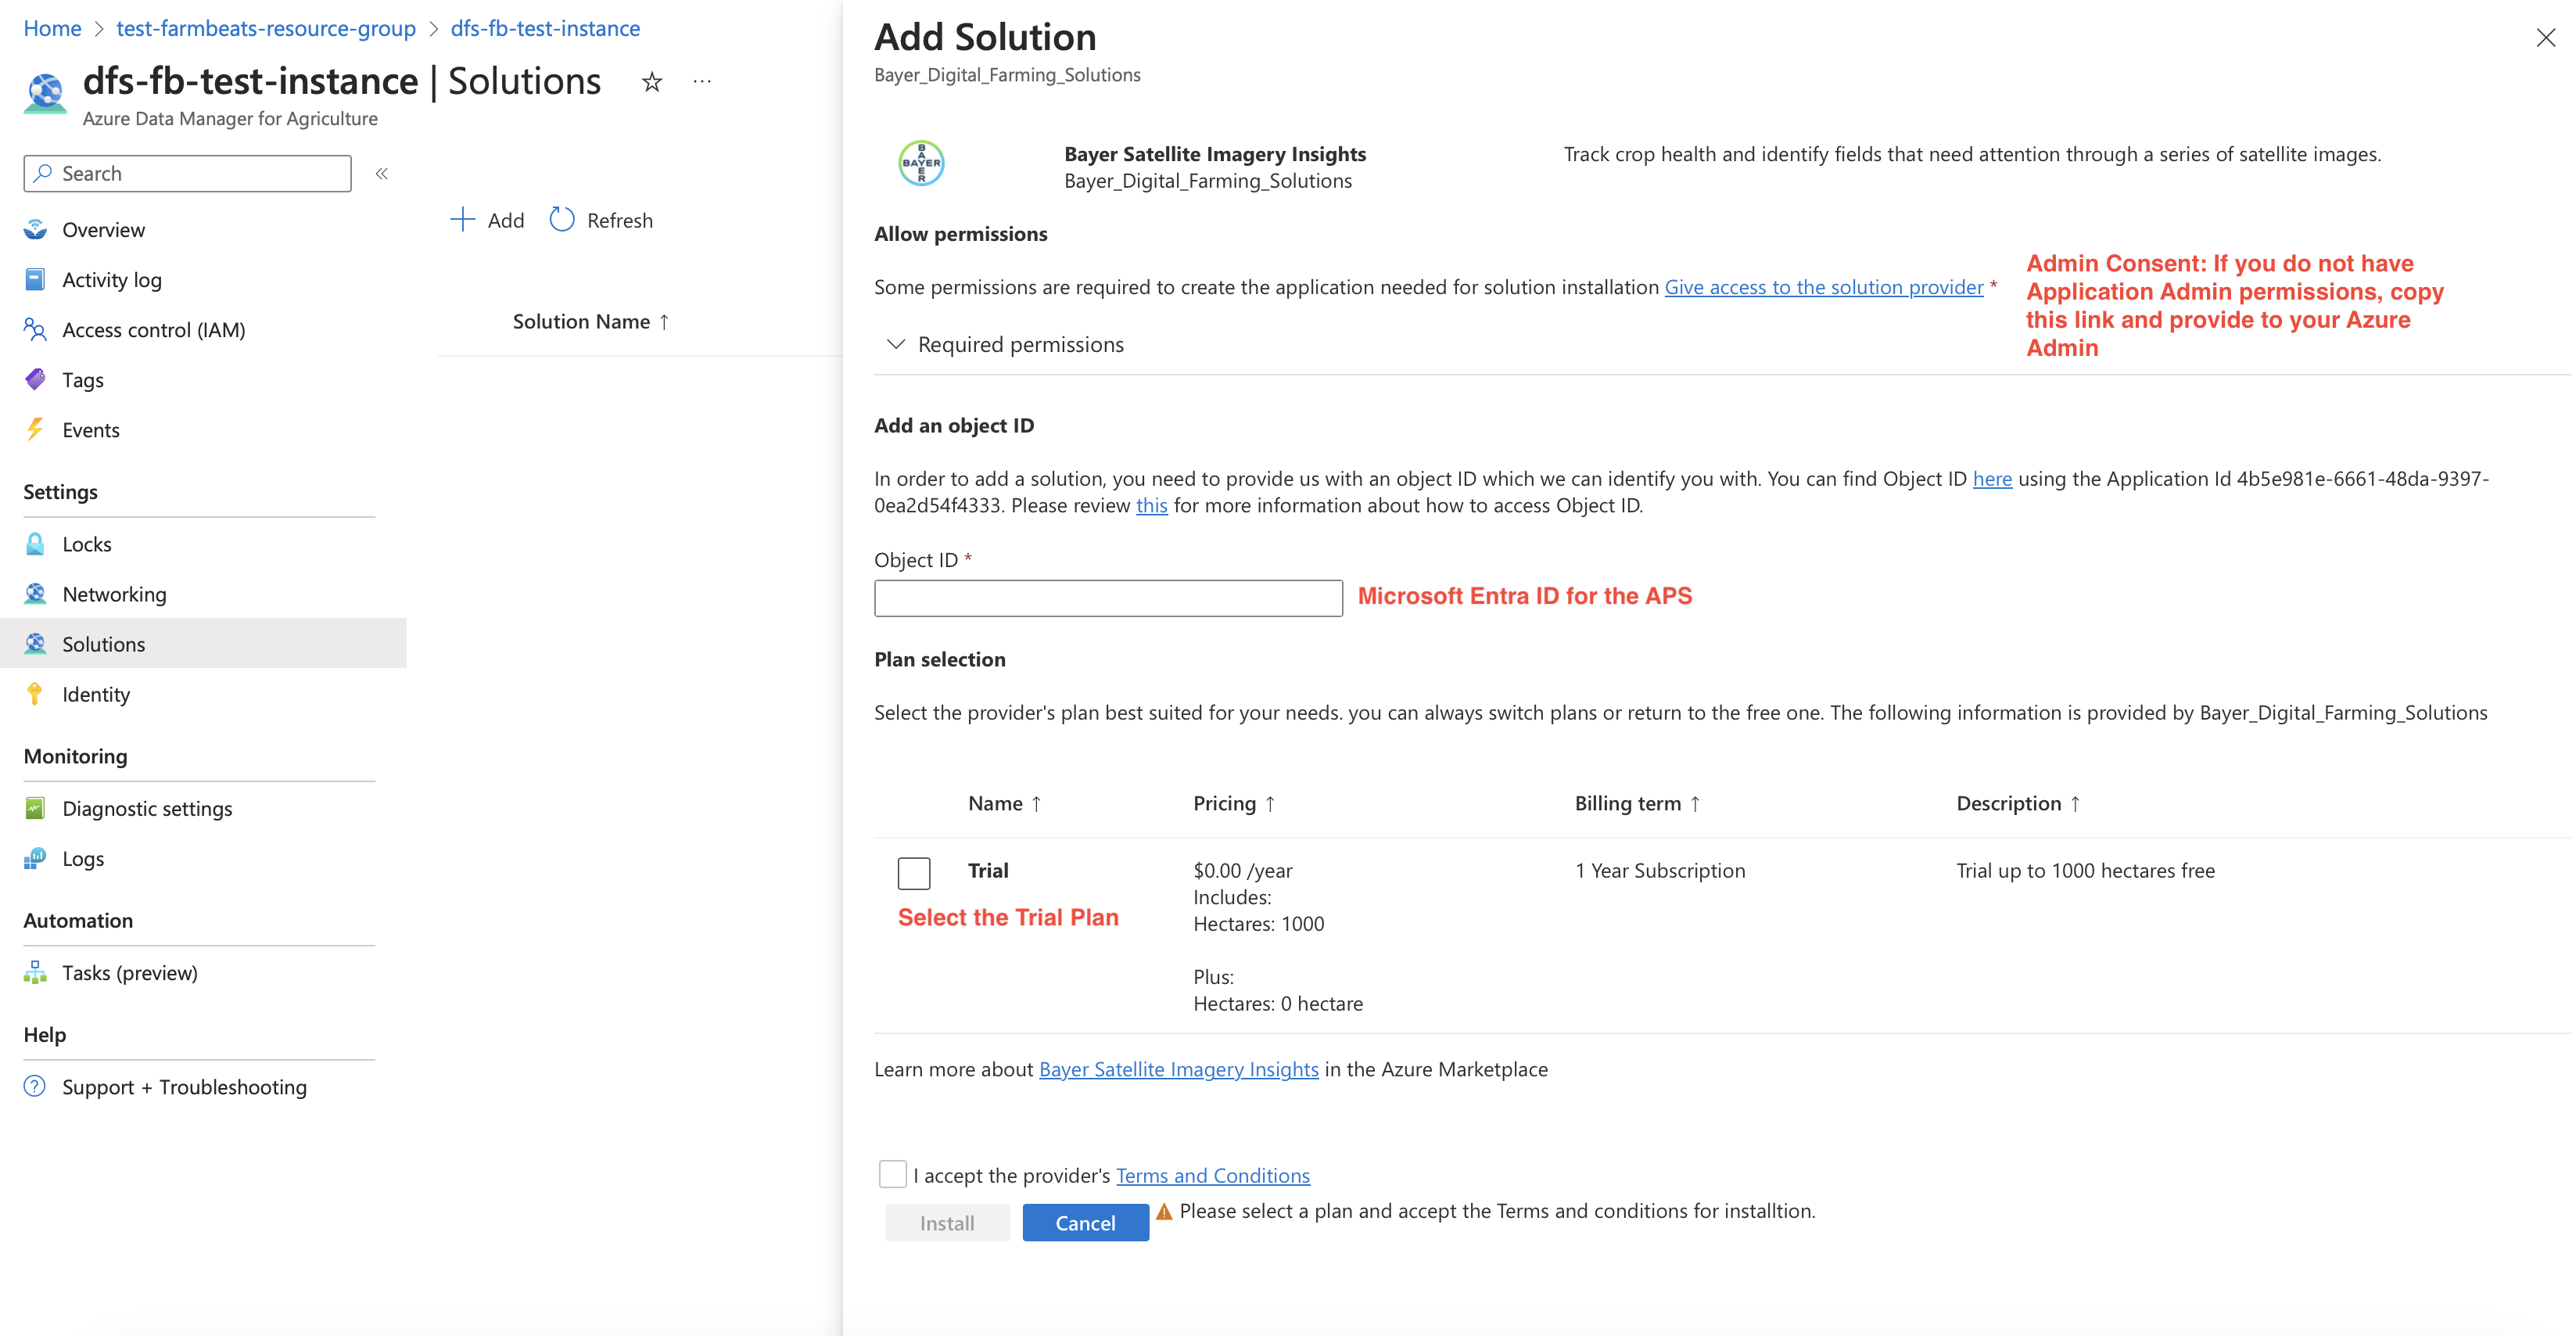 |
- Click Install when you have completed the steps in the form.
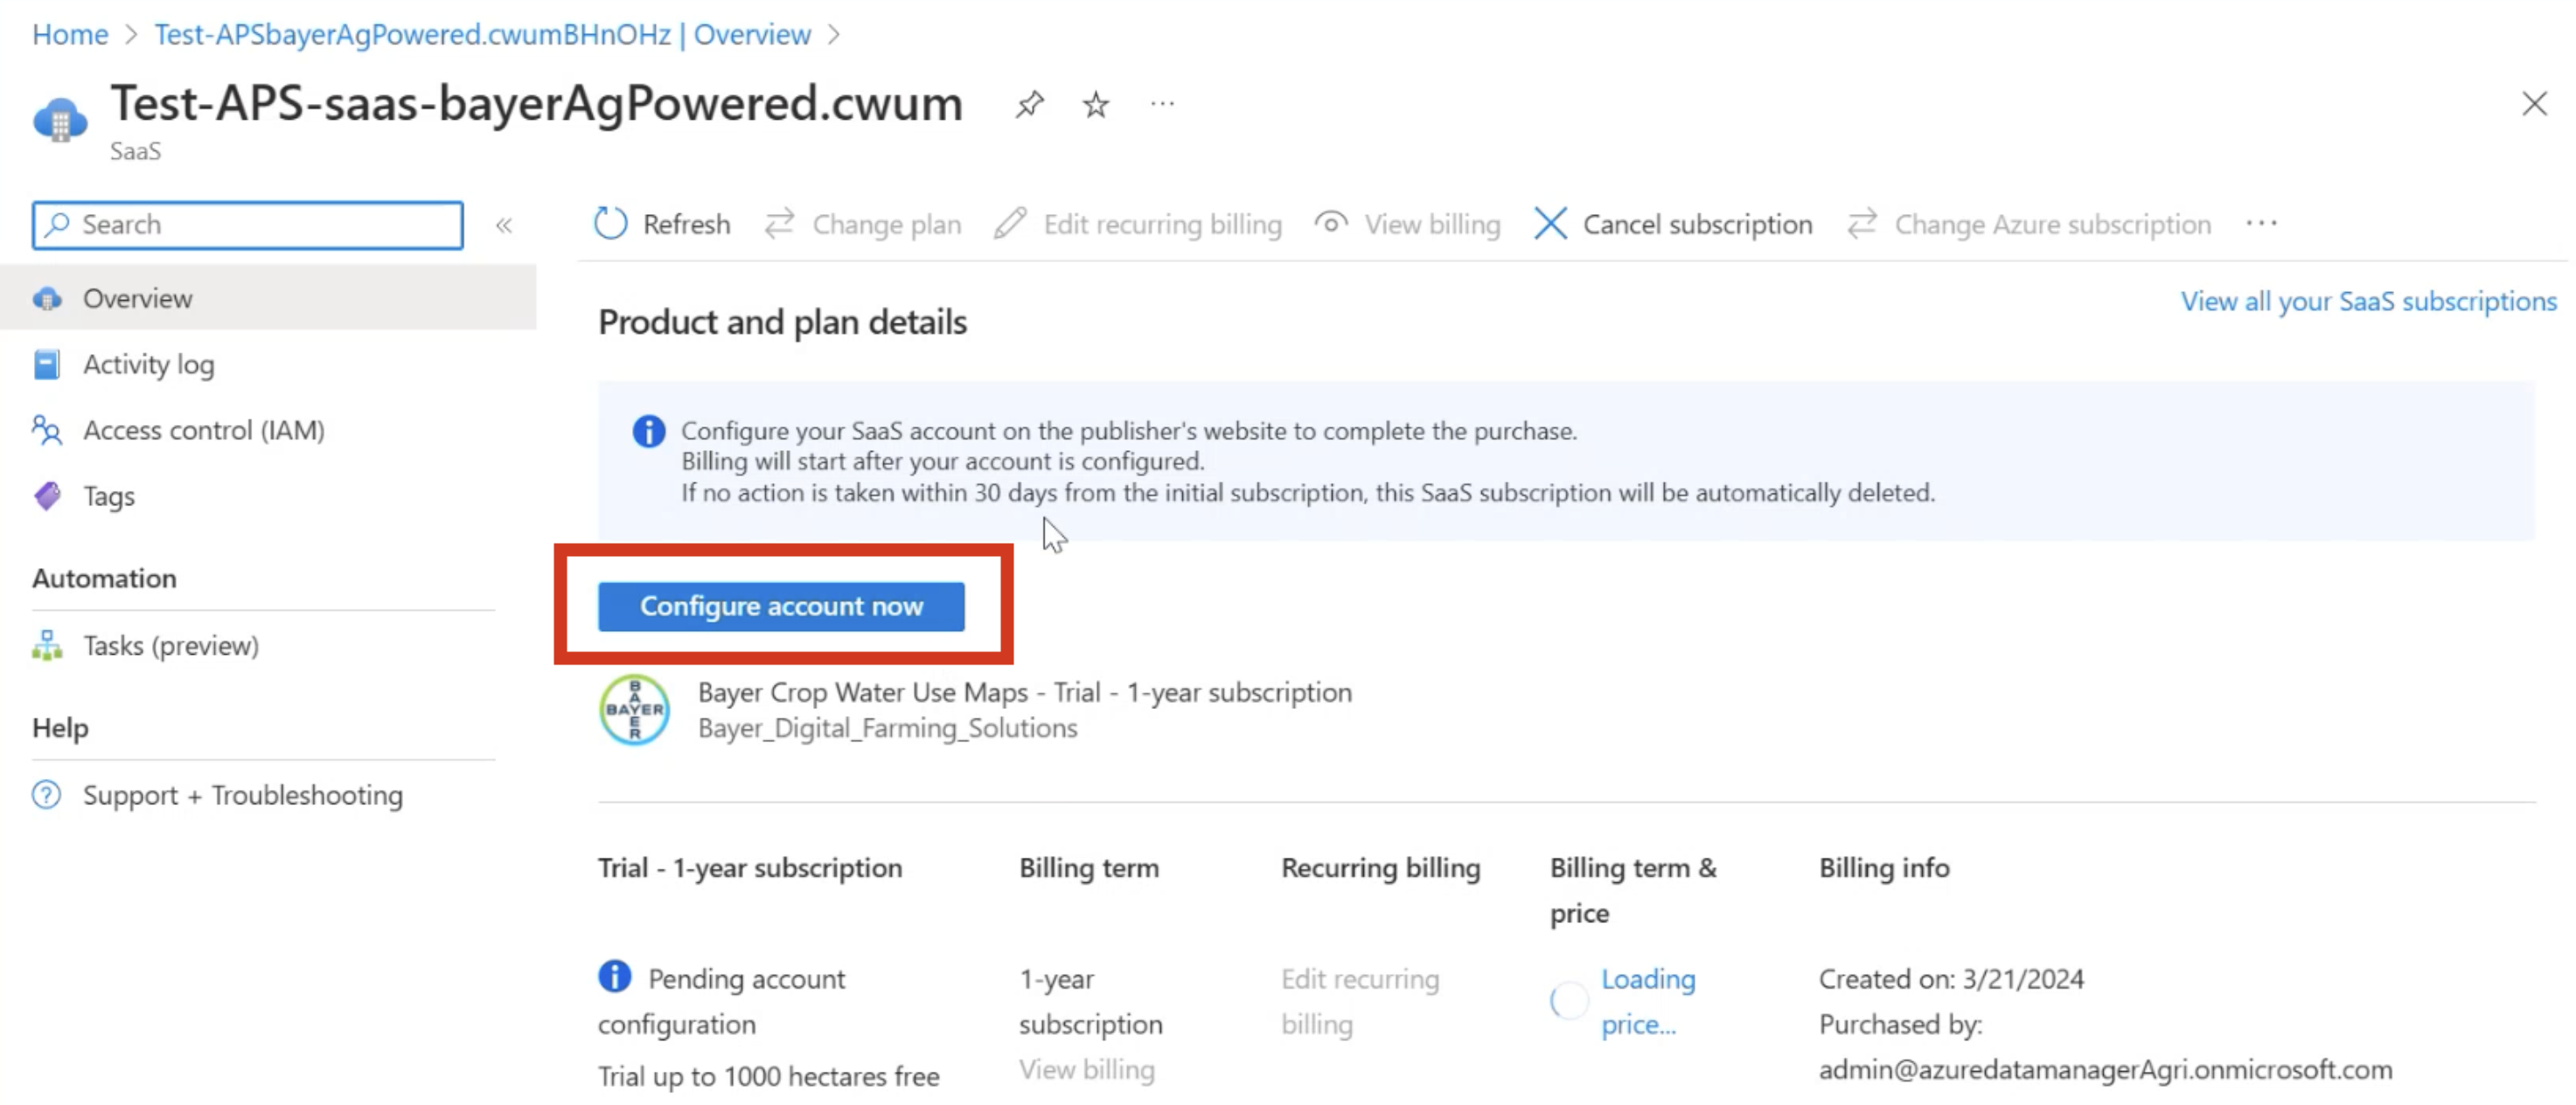
Configure SaaS Account
- Once the installation is complete, open Deployment Details and click on the SaaS resource link to go to the SaaS resource page.
| Find SaaS Resource in Completed Deployment |
|---|
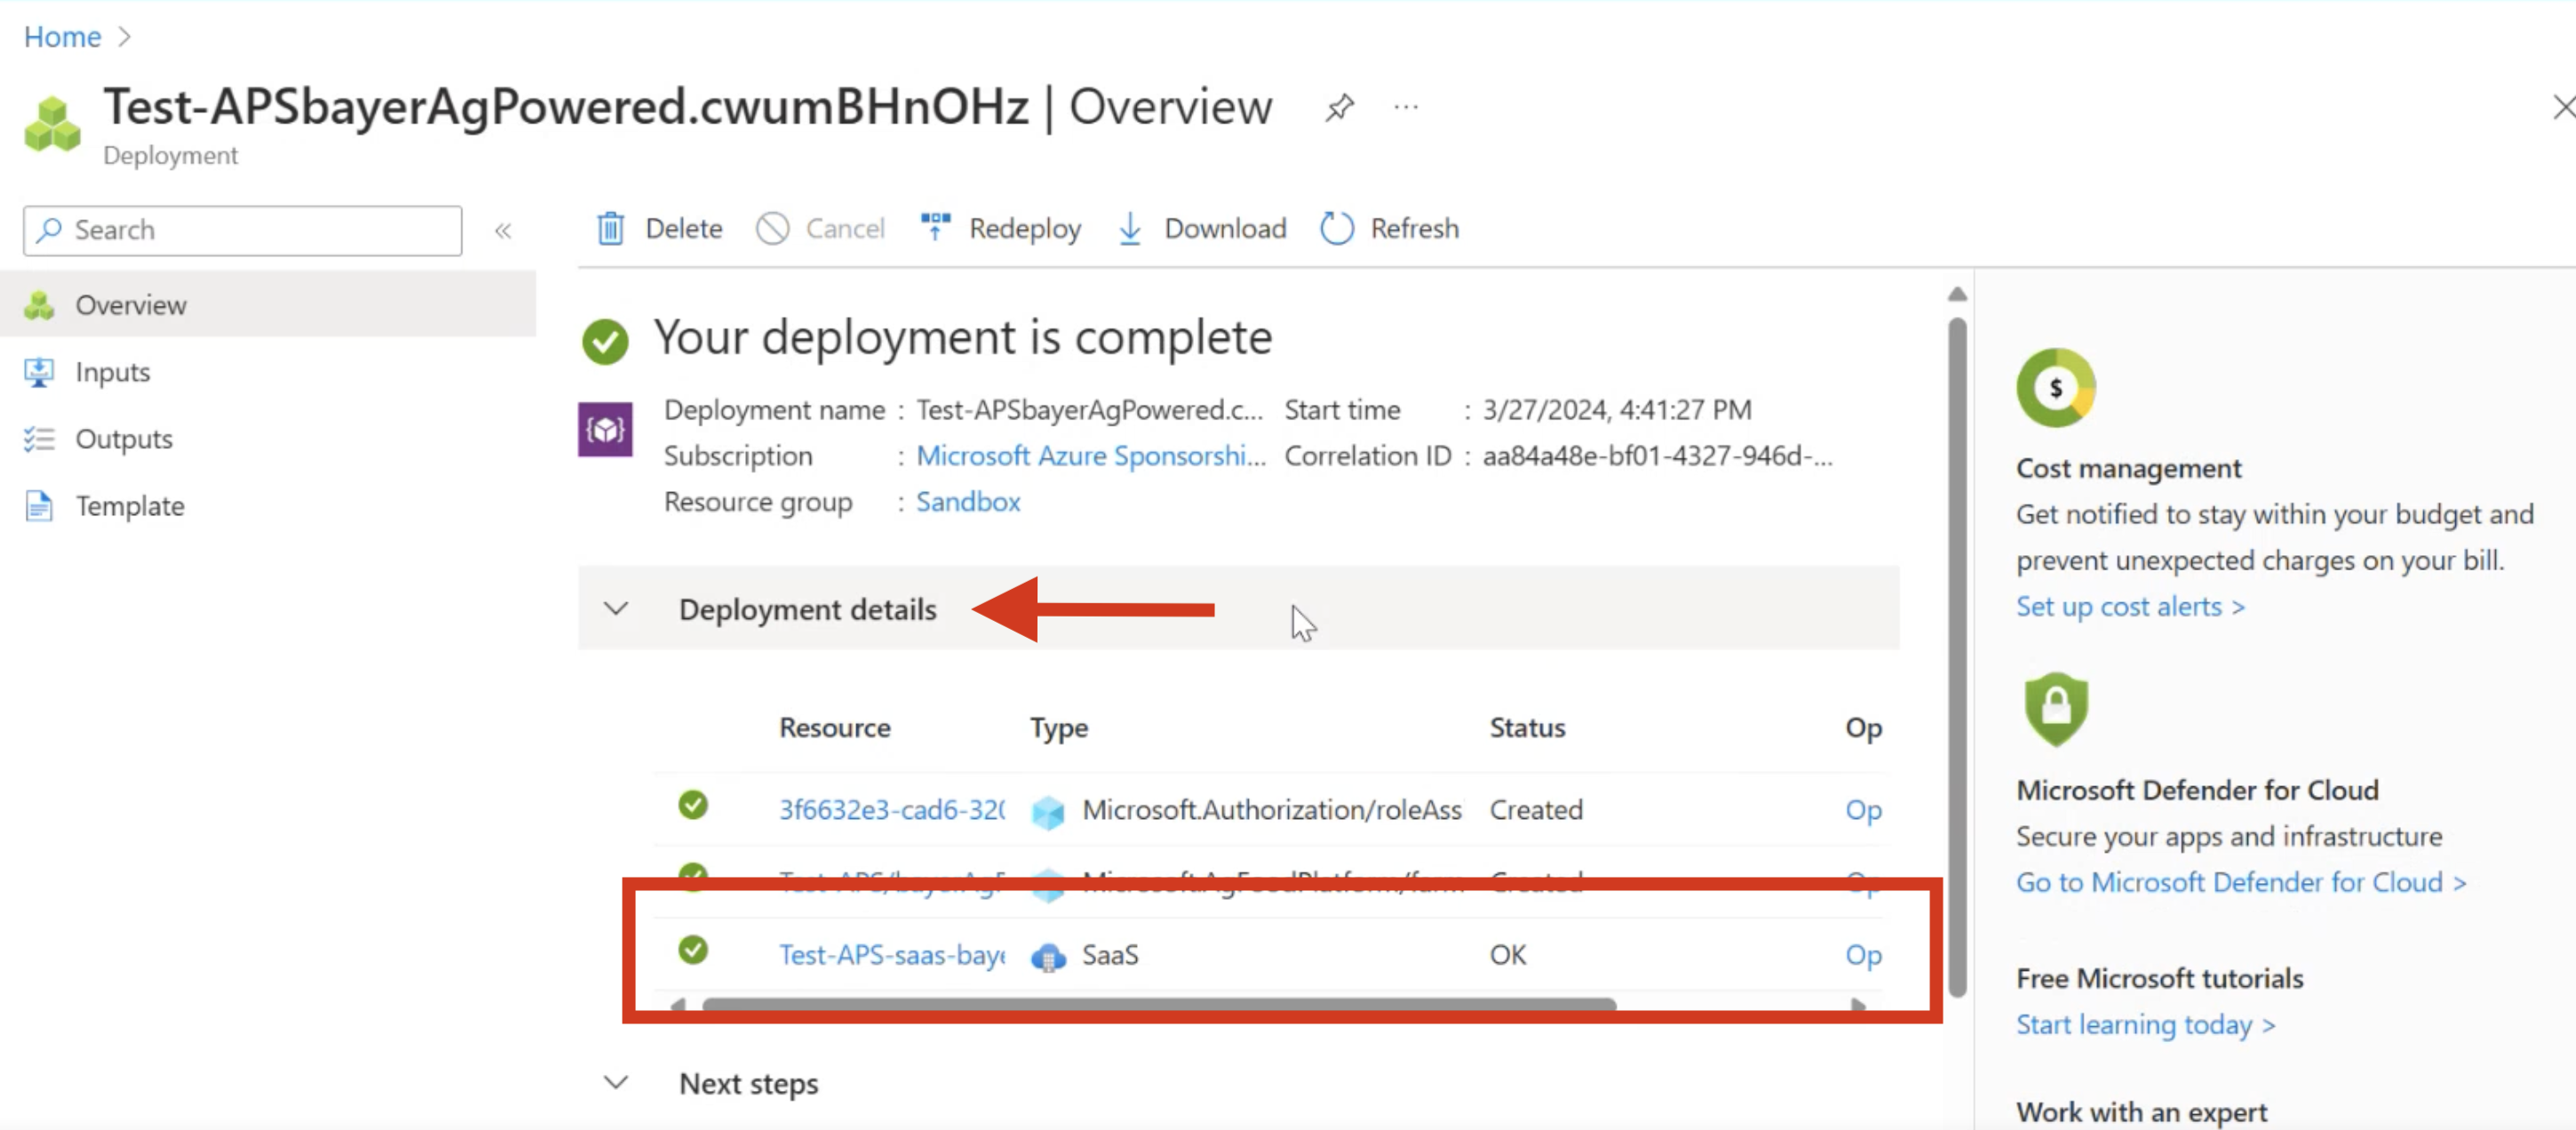 |
- In the SaaS resource page, click on Configure account now. This will initiate a request to Bayer to activate your account. We will activate your account with 2 Business Days (usually sooner).
| Configure SaaS Account |
|---|
 |
This process may take up to a minute to complete and your browser screen may be white. Once the account activation request is completed, you will be redirected to a confirmation page as follows:
| Bayer Confirmation |
|---|
 |
Configure Key Vault and BYOL Keys
APS requiring SentinelHub License: Imagery Insights APS, Crop Water Use Maps APS
If you are installing an APS that requires a license from a third-party data provider, you will need to complete these additional steps to configure your license keys. Note: This is a one-time action. If you have done this for an APS with the same BYOL dependency, no action is required.
- Have an active SentinelHub Account and License.
- Follow these instructions to configure your ADMA Key Vault and SentinelHub license keys.